
Every product is independently reviewed and selected by our editors. If you buy something through our links, we may earn an affiliate commission at no extra cost to you.
If you’ve just unboxed a Salter dual air fryer, you’re probably excited, but also a little uncertain about how to use both baskets efficiently. Air fryers can transform how you cook, cutting down on oil and time. But figuring out the right temperature, timing, and cleaning methods for a dual model can feel overwhelming at first.
The good news? Once you know how it works, the Salter dual air fryer becomes one of the most user-friendly and versatile kitchen helpers you’ll ever own. This guide will walk you through every essential step, from setup to cooking and cleaning, so you’ll feel confident using both drawers like a pro.
Understanding the Salter Dual Air Fryer
The Salter dual air fryer has two independent cooking baskets, allowing you to cook two different foods, or larger portions of one dish, at the same time. Each basket has its own temperature, time, and function settings.
This means you can roast vegetables in one drawer while crisping up chicken wings in the other, or cook both batches at the same time and finish together using the Sync Cook or Sync Finish functions.
Why Do People Love It So Much?
Air fryers, including Salter’s dual models, circulate hot air rapidly around your food. This convection effect makes your food crisp on the outside and tender on the inside, using up to 80% less oil than deep frying.
For busy households, the dual design doubles your output without doubling your time. It also saves energy compared to using a conventional oven for every task.
The Common Problem: Confusion and Inefficiency
Many new users struggle with one of three issues:
- Uneven cooking from overloading the baskets.
- Unclear programming—not recognizing when to use each function.
- Improper cleaning, which can lead to sticky buildup or smoke.
Understanding the logic of airflow, space, and time synchronization solves most of these frustrations early on.
Tools and Materials You’ll Need
You don’t need fancy supplies to get started, just a few basics:
- Salter dual air fryer (any model)
- Heat-resistant utensils (never metal on the nonstick baskets)
- Oil spray or brush for light, even coating
- Paper towels or soft cloth for cleaning
- Non-abrasive sponge
- Mild dish soap
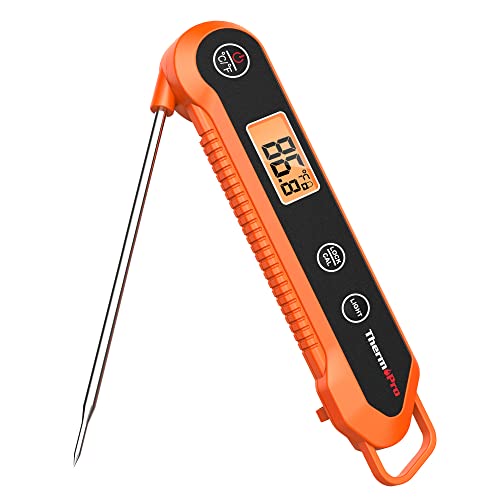
- Fast and accurate: 1-2 seconds response time! Meat thermometer digital features 3.9 inches food grade stainless steel pr…
- Completely waterproof: IPX6 waterproof rating means you can wash this cooking thermometer under running water without fe…
- Easy to Read: The large, easy-to-read numbers and bright backlit display make this instant read thermometer simple to ch…
Optional but helpful:
- Digital food thermometer for checking internal temps
- Oil mister (helps control the amount of oil precisely)
How to Use a Salter Dual Air Fryer (Step by Step)
Step 1: Unpack and Inspect
Remove all packaging materials, stickers, and foam. Check that both baskets and crisper trays are clean, undamaged, and fit securely into their slots. Never operate the air fryer without the crisper trays in place—they allow airflow under your food.
Step 2: Find a Safe Setup Spot
Place your Salter dual air fryer on a flat, heat-resistant surface, away from walls or curtains. Leave at least 10 cm (4 inches) of space around it for ventilation. Do not block the air outlets.
Step 3: Run a Test Cycle
Before cooking food, run a 10-minute preheat cycle at 180°C with empty baskets. This burns off any residual factory coating and removes any plastic smell from new units. Let it cool afterward.
Step 4: Choose Your Food and Function
Each Salter model has preset cooking modes (for example, fries, chicken, fish, bake, roast, and reheat). You can also manually set temperature (usually between 80°C–200°C) and time (1–60 minutes).
Use presets to learn the system, but over time, you’ll find manual settings give you more control.
Step 5: Load the Baskets
Spread your food in a single layer. Avoid stacking or overfilling to let hot air flow properly. A light spray of oil helps crisp the surface.
If cooking two foods that finish at different times—say, chips (20 min) and chicken breasts (25 min)—use the Sync Finish feature. It automatically adjusts the start times so both baskets finish together.
Step 6: Set Each Drawer
- Select the basket you want to program.
- Choose a preset or adjust time and temperature manually.
- Repeat for the second drawer, if using.
Step 7: Use “Sync Cook” and “Sync Finish” Functions
- Sync Cook: Both drawers cook with the same settings, handy when doubling a recipe.
- Sync Finish: Baskets cook at different settings but end simultaneously—ensuring your meal’s hot all at once.
Step 8: Shake or Turn Food Midway
Halfway through cooking, the air fryer beeps (most models). Pull out the drawer, shake or flip the food with silicone tongs, then slide it back in. This ensures even crisping.
Step 9: Check for Doneness
Use a thermometer if needed. Poultry should reach 75°C, beef 63°C, and fish 60°C internally. If you want more browning, add a few extra minutes.
Step 10: Cooling and Cleaning
Let the baskets cool completely before washing. Wipe the unit exterior with a damp cloth and wash baskets and trays with mild soap. Never immerse the main unit in water.
Simple Cooking Chart for Reference
| Food | Temperature | Time | Shake? | Notes |
| French Fries | 200°C | 16–20 min | Yes | Coat lightly in oil |
| Chicken Wings | 190°C | 20–25 min | Yes | Spray basket to prevent sticking |
| Salmon Fillet | 180°C | 10–12 min | No | Line with parchment if skin-on |
| Veggie Mix | 190°C | 10–14 min | Yes | Don’t overcrowd |
| Reheat Pizza | 160°C | 4–6 min | No | Watch to avoid over-drying |
Helpful Science: Why Air Frying Works
Your Salter dual air fryer uses convection heat and rapid air circulation. Unlike a microwave (which excites water molecules) or a deep fryer (which cooks by oil immersion), air fryers use forced hot air that mimics deep-fried crispness through the Maillard reaction—browning that happens when heat interacts with sugars and proteins.
Because the baskets are small and airflow is efficient, cooking times are shorter, energy use is lower, and results are consistently crisp.
Common Mistakes to Avoid
- Overfilling Baskets – Air can’t circulate, so food cooks unevenly.
- Skipping Preheat – Leads to soggy starts and longer cook times.
- Using Too Much Oil – Air fryers need minimal oil; excess creates smoke.
- Neglecting Midway Shake – Ingredients touching each other won’t brown properly.
- Using Harsh Cleaners – This damages the nonstick coating.
Expert Tips and Tricks
- Layer smartly: Denser foods (like chicken pieces) need warmer temps; pair them with lighter foods only if using Sync Finish.
- Batch cooking: Use Sync Cook to double your output efficiently.
- Reheating breaded foods: Try 160°C for a few minutes—it restores crispness without drying.
- Avoid water-based marinades inside baskets: Pat ingredients dry before cooking.
- Keep a simple log: Note your favorite timing and temperatures for consistency.
Daily Cleaning Steps
- Unplug the air fryer and let it cool for at least 30 minutes.
- Remove baskets and trays.
- Wash them in warm soapy water with a soft sponge.
- Wipe the heating elements with a slightly damp paper towel to remove residue.
- Dry thoroughly before reassembling.
Deep Cleaning (Monthly)
- Soak baskets in warm water + mild detergent if there’s oily buildup.
- Use a soft brush on corners and vents.
- Inspect for any peeling nonstick coating—replace parts if damaged.
- Clean the exterior vents gently with a small brush or vacuum nozzle.
Regular maintenance prevents smoke, smells, and overheating.
What NOT to Do
- Don’t use aerosol oil sprays directly on baskets—they can damage the nonstick coating.
- Don’t block air vents or put the unit against a wall.
- Don’t cook saucy or high-liquid foods directly—they may splatter inside vents.
- Don’t leave cooked food inside after the timer ends—it steams and softens.
- Don’t run the air fryer empty for long periods to preheat; five minutes is enough.
DIY vs Commercial Accessories
| Method | Pros | Cons |
| DIY Foil Liners or Parchment | Cheap, disposable, easy cleanup | Can block airflow if not perforated |
| Official Salter Accessories | Perfect fit, designed for airflow | Slightly pricier |
| Silicone Liners | Reusable, protects coating | Must be cleaned after every use |
Tip: If using liners, make sure they don’t rise up against the heating element—hot air needs space to circulate.
When to Call for Professional Help
You may need customer support if you notice:
- Electrical smell or smoke during normal use
- Uneven heating even when baskets are clean
- Error messages or flashing lights on the control panel
- Fan not spinning or making loud grinding sounds
Salter’s customer care can guide you through troubleshooting or repair. Never try to open the electrical unit yourself.
Time, Cost, and Effort Considerations
- Setup time: 5–10 minutes.
- Cooking time: 10–25 minutes depending on recipe.
- Cleaning time: 10 minutes max if done regularly.
Overall, the dual air fryer saves more time and energy than using an oven for similar portions—and needs much less oil, reducing ingredients cost over time.
Frequently Asked Questions
1. Do I need to preheat my Salter dual air fryer every time?
Not always, but preheating helps achieve crispier results—especially for frozen foods or meats.
2. Can I cook two completely different foods at once?
Yes! Use the Sync Finish function so both finish together even if their times differ.
3. Is it safe to line the basket with foil or parchment?
Yes, as long as it doesn’t block airflow and is properly weighted down by food. Avoid loose pieces that could fly into the heating element.
4. How much oil should I use?
Usually just a light mist or 1 tsp per basket. The air fryer’s design reduces oil need dramatically.
5. Can I bake cakes or desserts in it?
Absolutely. Use small, oven-safe silicone or metal tins that fit inside the basket. The heat circulation bakes evenly.
6. My food comes out soggy, what am I doing wrong?
You’re likely crowding the basket or skipping the shake step. Spread food in a single layer and shake at least once.
Comparison: Air Fryer vs Traditional Oven
| Feature | Salter Dual Air Fryer | Conventional Oven |
| Preheat Time | 3–5 minutes | 10–15 minutes |
| Energy Efficiency | High | Moderate |
| Oil Needed | Minimal | Moderate |
| Crispiness | Excellent | Good |
| Batch Size | Smaller | Larger |
| Cleaning | Easy baskets | Full oven cleanup |
For smaller households or quick meals, the dual air fryer clearly wins on convenience and efficiency.
Preventive Tips for Long-Term Use
- Always cool and clean the baskets after every use.
- Store the air fryer unplugged in a ventilated spot.
- Check the cord for damage before each use.
- Avoid using metal utensils or stack heavy items on top when storing.
- Run a “dry cycle” (5 min at 180°C) occasionally to keep heating elements clear.
Conclusion
The Salter dual air fryer combines fast, healthy cooking with simple controls, once you know how to use it properly. By mastering your presets, syncing features, and cleaning habits, you’ll get consistent, crisp, golden results every time.
Start small: cook a batch of fries and chicken wings to learn timings, explore presets, then move up to meals that use both baskets in sync. With practice, your Salter dual air fryer will replace multiple kitchen gadgets, saving time, oil, and energy while giving you perfectly cooked results at the touch of a button.
Next steps:
- Try the Sync Finish feature tonight with two different foods.
- Keep a simple note of your favorite settings.
- Make cleaning part of your daily routine—it keeps performance at its best.
Your new favorite kitchen helper is ready—now it’s time to make the most of it.