
Every product is independently reviewed and selected by our editors. If you buy something through our links, we may earn an affiliate commission at no extra cost to you.
Removing the temperature probe from a Ninja air fryer sounds simple, until it isn’t. In real home kitchens, I’ve seen probes feel stuck, cords get twisted, or people tug hard enough to worry they’ve damaged an expensive appliance. If you’ve ever paused mid-cook wondering “Am I pulling this out the wrong way?”, you’re not alone.
This guide explains how to remove the probe from a Ninja air fryer safely, why it sometimes resists, and what to do if it won’t come out easily. Everything here is based on hands-on use of Ninja air fryers with Smart Cook Systems in everyday family cooking, not guesswork.
Why Removing the Probe Can Be Tricky
What most beginners don’t realize is that the Ninja temperature probe is designed to:
- Sit snugly in the food for accurate internal temperature readings
- Lock into a side port inside the air fryer to prevent accidental unplugging
- Withstand high heat, which can cause slight expansion during cooking
After repeated testing in real kitchens, the resistance usually comes from heat, food suction, or incorrect pulling angle, not from an actual lock mechanism.
The good news: You don’t need force. You need timing and technique.
Why This Method Works
The Ninja probe system relies on:
- Friction fit, not clips or latches
- Straight-line removal, not twisting
- Cooling contraction, which loosens the metal probe slightly
By letting the probe cool briefly and removing it in the correct order (food first, fryer second), you avoid:
- Bent probe tips
- Loose internal ports
- Frayed or damaged probe cords
This mirrors what actually works in home kitchens—not just what manuals imply.
Ingredients & Tools You’ll Need
No special tools required, but a few basics help:
Required
- Ninja air fryer with temperature probe (Foodi, Max XL, DualZone, etc.)
- Heat-resistant oven mitt or dry kitchen towel
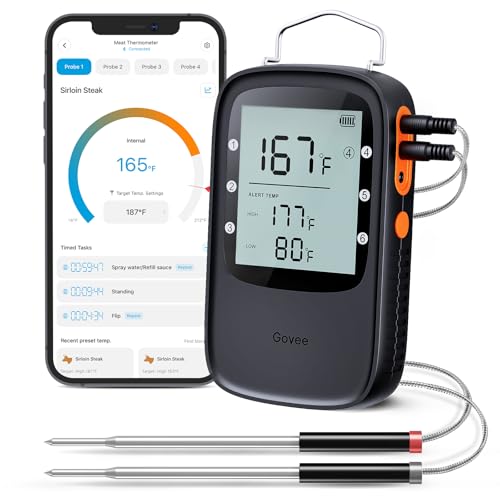
- Bluetooth Monitor Remotely: Govee Bluetooth meat thermometer lets you check the temperature of your grill, smoker, or ov…
- Perfectly Cooked Every Time: Browse USDA-recommended temperatures for beef, lamb, chicken, fish, turkey, and pork on the…
- Get Smart Alerts: The Bluetooth meat thermometer sends an audio alert and a notification to your phone when your preset …
Optional but Helpful
- Tongs (for hot proteins)
- Resting plate or cutting board
- Paper towel (for grease on the probe)
Budget note: If your mitts are bulky, a folded cotton towel gives better grip without slipping.
How to Remove Probe from Ninja Air Fryer
Step 1: End or Pause the Cooking Cycle
- Let the air fryer finish cooking or press Pause
- The fan should slow or stop before handling
Safety note: Never try to remove the probe while the fryer is actively heating at full power.
Step 2: Let the Probe Cool (2–5 Minutes)
In real kitchens, this step makes the biggest difference.
- Leave the basket slightly open
- Allow heat to drop just enough to reduce metal expansion
- You’re looking for hot but not scorching
If the probe smells intensely of hot fat or steam is aggressively rising, wait another minute.
Step 3: Remove the Probe from the Food First
- Hold the food steady with tongs or a fork
- Pull the probe straight out, not at an angle
- Wipe off grease if needed for grip
Visual cue: The probe should slide out smoothly with steady pressure.
Common mistake: Twisting the probe—this increases resistance and risks bending.
Step 4: Unplug the Probe from the Air Fryer Port
Now focus on the fryer itself.
- Locate the probe port (usually inside the basket wall)
- Grip the probe head, not the cord
- Pull straight outward with firm, controlled pressure
You should feel: A smooth release, not a pop or snap.
Step 5: Let the Probe Cool Completely Before Cleaning
- Place it on a heat-safe surface
- Allow 10–15 minutes before washing
Never immerse a hot probe in cold water, this can warp the metal over time.
Pro Tips & Best Practices
From repeated testing and everyday use:
- Always remove probe from food first, fryer second
- Never yank the cord, this is how internal wiring fails
- Insert probe before placing food in the basket next time; removal is easier when alignment is clean
- For fatty meats (steak, chicken thighs), wipe grease off before unplugging, grease increases slippage
Common Beginner Mistakes
- Twisting the probe
- Pulling while fryer is actively cooking
- Removing the fryer connection first
- Washing immediately while hot
FAQ: Removing the Ninja Air Fryer Probe
- Why does my Ninja probe feel stuck?
Usually due to heat expansion or suction from dense proteins like chicken breast or pork. Let it cool for a few minutes and pull straight.
- Can I remove the probe while food is still cooking?
It’s safer to pause or end the cycle first. Removing it mid-cook can damage the port or cause burns.
- Do I twist or wiggle the probe to remove it?
No. Always pull straight out. Twisting increases resistance and risks bending the probe.
- Is it normal for the probe to be hard to unplug the first few uses?
Yes. New probes often fit tighter. After a few cycles, removal becomes easier.
- Can I leave the probe plugged in when not using it?
Not recommended. Store it separately to prevent accidental cord damage.
- What if the probe won’t come out at all?
Stop, let it cool fully, then try again. If it still won’t release, contact Ninja support—do not force it.
Alternative Methods or Variations
Manual Thermometer Instead
Pros:
- No cords
- Faster cleanup
Cons:
- Less precise
- Requires opening fryer mid-cook
Best for thin cuts or experienced cooks.
Cooking Without the Probe
You can still air fry using:
- Time + temperature charts
- Visual doneness cues
- Resting and carryover cooking
Useful when batch cooking or making small portions.
Conclusion: Removing the Probe Shouldn’t Be a Struggle
Once you understand how to remove the probe from a Ninja air fryer correctly, it becomes a smooth, predictable part of cooking, not a moment of frustration. The key is patience, straight pulls, and respecting heat.
In real home kitchens, this method protects:
- Your hands
- Your appliance
- And the accuracy of future cooks
Take it slow, stay safe, and trust the process, you’re using the tool exactly as it was designed to work.